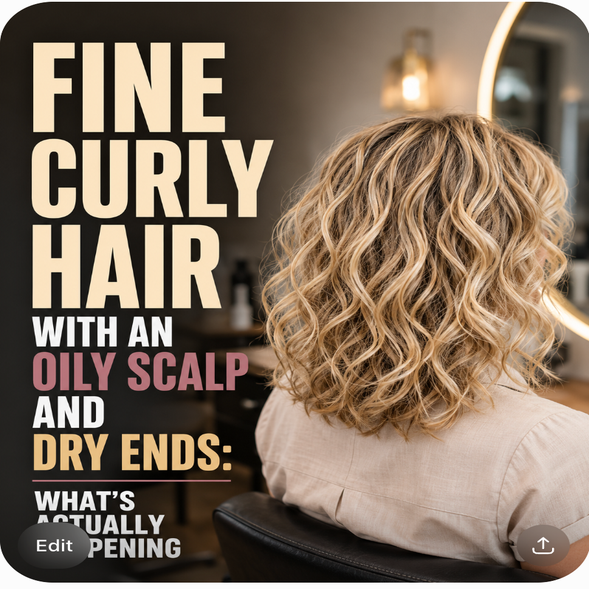
Over ten years ago, my hair was in the worst shape of my life. I’d had a bleach job go wrong, my whole head lightened, roots and all, and then I kept reaching for heat to make the damage look presentable, which only dug the hole deeper. My curls had stopped acting like curls. My ends were dry, rough, and snapping off, and I genuinely didn’t know where to begin fixing it. I tried product after product, followed every rule I read, and mostly just spun in circles getting more overwhelmed.
Eventually I did something that felt drastic at the time: I chopped off most of the damaged hair and committed to actually learning how my hair works, not just collecting products. That decision, plus a lot of patience, is what turned things around. The healthy curls I have now aren’t the result of one miracle product. They’re the result of understanding a handful of fundamentals and applying them consistently.

This guide is everything I wish someone had handed me at the start, in order. It won’t promise overnight results (nothing honest can), but it will save you the years of trial and error I went through. Let’s build your healthy hair journey the same way I eventually built mine: one fundamental at a time.
| Before anything else, the one mindset shift that matters most: a healthy hair journey is about understanding your hair, not accumulating products. The people who succeed aren’t the ones with the biggest product shelf, they’re the ones who learned what their hair actually needs and stayed consistent. Expect it to take months, not days. That’s not discouraging; it’s the thing that keeps you from quitting when week two doesn’t look like a transformation. |
Step 1: Get Familiar With Your Hair Type (But Don’t Obsess Over It)
When I started, I had no idea what my ‘type’ was, and I’m here to tell you that’s fine. Knowing your curl type is a useful reference point for choosing styling techniques, but it is not a prerequisite for healthy hair, and it’s easily the most overrated first step in most guides. Curl pattern can even shift as your hair gets healthier. Treat it as a loose orientation, then move on to the things that actually drive your routine.
Step 2: Learn Your Porosity, the Real Foundation
This is the one that actually changes how you care for your hair. Porosity describes how easily water and product move into and out of your strand through the cuticle, and it comes down to the condition of that cuticle. High-porosity hair (often damaged, color-treated, or heat-stressed hair, which is where most of us start a ‘journey’) has a raised, permeable cuticle that takes water and product in fast and loses it just as fast. Lower-porosity hair has a smoother, tighter cuticle that’s slower to absorb.
Neither is better; they just need different handling. And here’s the honest reframe most guides skip: porosity isn’t a fixed ‘type’ you’re born stuck with, it largely reflects how damaged the cuticle is. That’s genuinely good news, because it means as your hair gets healthier, its behavior improves too. Give it a few months of consistent care before you try to pin down your porosity; it’s easier to read once you’ve stopped actively fighting your hair.
Step 3: Consider a Fresh Start With a Curly Cut (or a Chop)
I didn’t even know curly hair specialists existed when I started. They do, and a curly cut (a dry cut that works with your natural pattern) can meaningfully improve how your curls look and behave. More importantly for a damage-recovery journey: damaged ends don’t heal. Hair is not living tissue, so a split, fried end can be temporarily smoothed but never truly repaired, only cut off. I chose to chop off most of my damaged hair and grow out from a healthier baseline. You don’t have to big-chop, but removing the worst of the damage is often the single fastest visible improvement.
| Growing out a specific chemical or heat transformation? If you’re moving from relaxed or heat-damaged hair back to your natural texture and dealing with two textures on one strand, that’s its own specific challenge (the fragile ‘demarcation line’ where new growth meets processed hair). We cover that in depth in the guide to transitioning to natural hair. This guide covers the broader healthy-hair foundation everyone needs. |
Step 4: Honestly Assess the Damage You’re Starting With
Most guides skip this, but naming where you’re actually starting makes everything after it easier. Rough, straw-like texture, mid-strand splits, lack of shine, and snapping when you comb are all signs the cuticle is compromised. If you’re not sure how bad it is, our guide to the signs your hair is damaged walks through what to look for. This matters because it sets realistic expectations: badly damaged hair is managed and grown out, not restored to undamaged, and knowing that up front is what keeps you from feeling like you failed when a product doesn’t ‘fix’ it.
Step 5: Build Your Wash Day, the Cornerstone
Wash day is the backbone of a healthy routine: cleansing, conditioning, deep conditioning, and (as needed) clarifying or chelating to clear buildup. How often you wash is personal, driven by your scalp’s oil production, your activity and sweat, product buildup, and your environment. Start with a simple weekly rhythm and let your hair tell you whether to wash more or less.
One correction worth making early, since it trips up so many beginners: gentler isn’t automatically better, and ‘sulfate-free’ isn’t a guarantee of anything. What matters is matching cleanser strength to your hair and actually removing buildup when it accumulates. Our surfactant guide breaks down what ‘gentle’ really means.
Step 6: Understand What ‘Moisture’ Actually Means (This One Correction Changes Everything)
Here’s where I have to correct the advice I used to give, including in the older version of this very post. For years, everyone (me included) called the goal ‘moisture’ and told you to add it and lock it in. That framing quietly sets people up to fail, and it’s worth getting right, because misunderstanding it is exactly how I ended up giving myself hygral fatigue by over-‘moisturizing’ early on.
The accurate picture: your hair’s actual water content is governed by the humidity around it, not by how much product you apply, and it’s constantly exchanging water with the air. You can’t pour water into a strand and seal it in. What products actually do, and what genuinely makes hair feel soft and behave well, is condition: they lay down emollients and cationic ingredients that smooth the cuticle, reduce friction, and make the surface feel good. So when a leave-in or a mask makes your dry hair feel dramatically better, that’s conditioning at work, not water you successfully trapped.
Why does this matter for a beginner? Because ‘my hair is dry, I need more moisture’ leads people to pile on heavy products, wash less, and overdo humectant-and-water routines, sometimes to the point of that hygral-fatigue over-conditioning I gave myself. The right mental model, condition the surface, reduce friction, and repair-by-protecting rather than repair-by-soaking, leads to gentler, more effective choices. If your hair genuinely feels weak and mushy rather than just rough, that’s usually a protein-versus-conditioning balance question, which is its own topic.
| Beginner shortcut for very dry, rough hair: a lightweight mix of water and a little conditioner, misted on and smoothed through, is a cheap, effective way to add slip and refresh curls between washes. Just know what it’s doing, it’s giving you surface conditioning and slip, not ‘hydrating from within,’ so keep it light and don’t overdo it. |
Step 7: Establish Your Core Routine, Then Layer In Advanced Steps
Once cleansing and conditioning feel steady, build them into an actual routine with a daily/weekly/monthly rhythm. Then, and only then, layer in the more advanced tools as your hair signals a need for them: a pre-poo or hot oil treatment before wash day, a deep conditioner for hair that needs more surface conditioning, a rinse-out conditioner suited to your porosity, and protein treatments when your hair feels weak. The mistake I made, and want you to skip, is doing all of it at once. You can’t tell what’s working when you change five things simultaneously.


Step 8: Find Your Products Through Deliberate Trial and Error
There is no shortcut around this part, but there is a smart way to do it. Finding your products is genuinely trial and error, you learn what doesn’t work to find what does, but you can make it cheaper and clearer:
- Buy travel or sample sizes first so you’re not committing to a full bottle of something that may not suit you.
- Change one thing at a time. Add or remove a single product and give it a real chance before judging, so you can actually tell what did what.
- Give products a fair window. Sometimes hair needs a few uses to adjust; don’t discard something after one wash unless it clearly causes a problem. And keep a shortlist, hair’s needs change over time, and a product that flopped once might fit later.
And ignore ‘natural’ and ‘organic’ as quality signals. They’re marketing words, not safety or efficacy guarantees, some natural ingredients don’t suit every hair type, and origin tells you nothing about whether a formula will work for you. Judge the actual ingredients and how your hair responds, not the label’s vibe.
Step 9: Protect Your Hair Between Washes
Healthy hair is as much about preventing damage as adding anything. The highest-leverage protective habits:
- Sleep on satin or silk (pillowcase, bonnet, or scarf) to cut the friction that roughens the cuticle overnight.
- Dry with a microfiber towel or an old T-shirt, never a rough cotton towel, to reduce friction while wet.
- Detangle gently, on conditioner-slicked hair, with a wide-tooth comb or fingers. Wet hair is at its most fragile, so this is where a lot of avoidable breakage happens; here’s the why.
- Minimize heat, and use a heat protectant when you do use it. If you’re recovering from heat damage specifically, that guide is built for it.
- Use transition and protective styles (twist-outs, braids, low buns) to reduce daily manipulation, especially if you’re managing more than one texture.
Step 10: Support Your Hair From the Inside, and Be Patient
Hair health has a real internal component: a balanced diet with enough protein, vitamins, and minerals, plus general hydration, genuinely supports the hair growing out of your scalp (though, to be clear, drinking water doesn’t change the texture of the hair you already have, that’s surface conditioning’s job). If your hair changed suddenly with no external cause, that’s worth a doctor’s visit, since thyroid, iron, and other factors show up in hair.
And then the hardest ingredient: patience. Keeping a hair journal with photos genuinely helps, on the slow days it shows you progress you can’t see in the mirror. Find someone a little further along with similar hair for a realistic benchmark, not a comparison trap. My own turnaround took months of consistency, not a magic week. Damaged hair is not an insurmountable problem; it just responds to steady, informed care over time, not to panic-buying.


FAQs
Where do I even start with damaged hair?
Start by removing the worst of the damage (a good cut or chop), then learn your porosity, then build a simple wash-day routine before adding anything advanced. Damaged ends can’t be repaired, only grown out, so the fastest visible win is usually cutting the most compromised hair and protecting what grows in.
How long does a healthy hair journey take?
Months, realistically, and it’s ongoing rather than a finish line. Hair grows about a centimeter a month, so growing out damage is inherently slow. The upside is that the day-to-day feel of your hair improves much faster than length does, often within a few wash days of getting the routine right.
Do I need to know my curl type before I start?
No. Curl type is a helpful styling reference but not a requirement, and it can even change as your hair gets healthier. Porosity and the condition of your cuticle matter far more for how you actually care for your hair.
Why does my hair still feel dry no matter how much I moisturize?
Because ‘dryness’ in hair is usually a rough, damaged surface, not a lack of water you can add. Piling on more product can even backfire. The fix is conditioning that smooths the cuticle plus removing the source of the roughness (heat, harsh handling, buildup), not soaking the strand. If it feels weak and mushy rather than rough, look at the protein-conditioning balance instead.
Should I avoid all sulfates and silicones as a beginner?
Not as a blanket rule. While you’re restoring badly damaged hair, leaning gentler can help, but sulfates and silicones aren’t automatically bad; they’re formulation choices. It’s more useful to judge how your hair responds than to ban whole ingredient categories on principle.
Is it normal to feel overwhelmed by all the information?
Completely, and trying to learn everything at once is how people overwork their hair (it’s how I gave myself hygral fatigue). Start with a simple routine, add one new thing at a time, and let your understanding build gradually. Slow is not only fine here, it’s the winning strategy.
The Bottom Line
If I could go back and hand my overwhelmed, damaged-hair self one thing, it would be this guide’s order of operations: remove the damage you can’t fix, learn your porosity, build a simple wash day, understand that ‘moisture’ really means conditioning, then layer in the rest one deliberate step at a time. That’s the whole journey, minus the years I spent guessing. Be patient, protect more than you add, change one thing at a time, and let your hair guide you. Healthy hair isn’t a product you buy; it’s a practice you build, and you’re fully capable of building it.