Fact Checked & Reviewed By Jerika Bulala
Jerika is a chemist with almost 10 years of experience. She finished her Bachelor of Science in Chemistry…
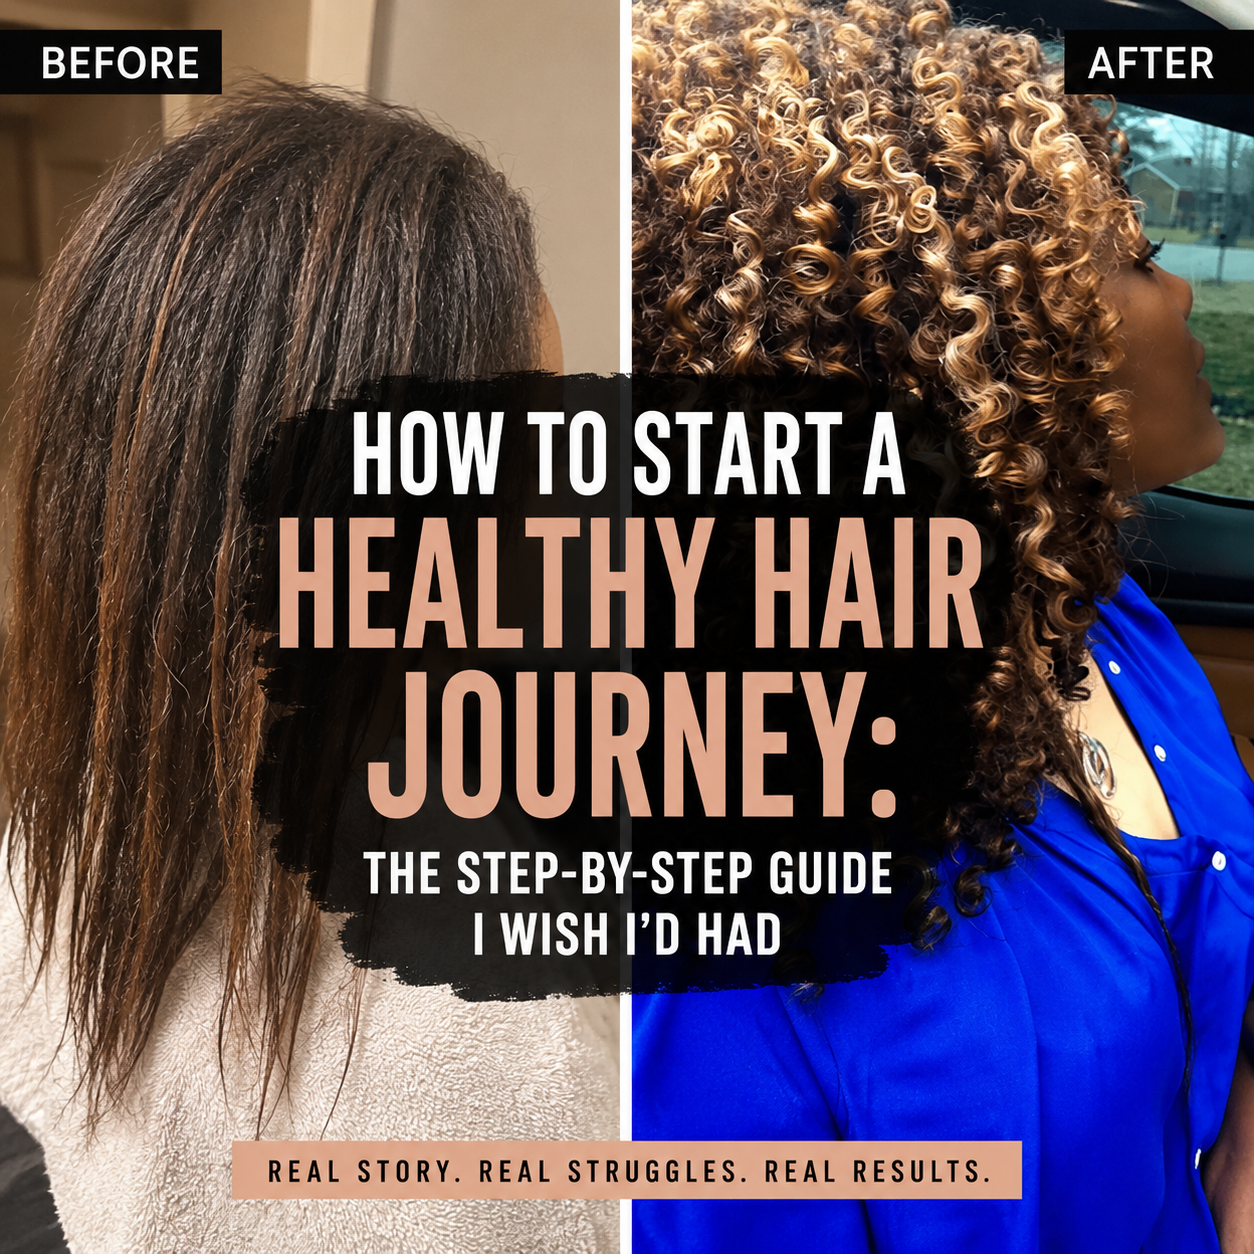
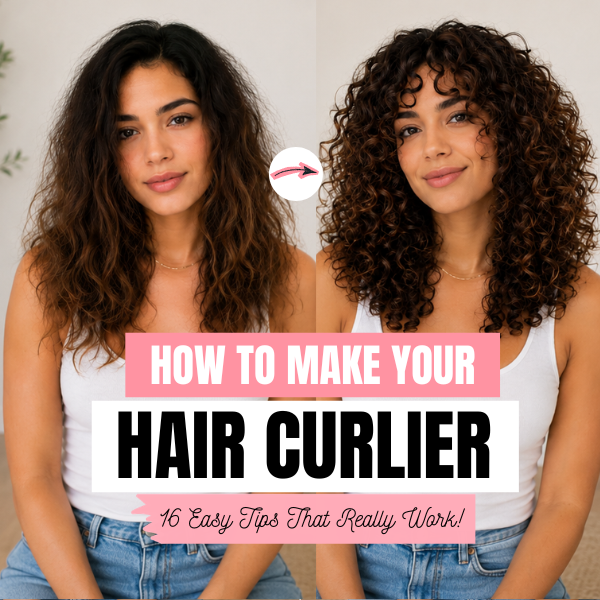
During my journey to repair damaged hair and restore definition, I faced one of the most common curly hair problems: curls that looked flat and refused to hold their shape. I wanted to enhance my natural curls but felt overwhelmed about where to begin. As I scrolled through Instagram admiring women with gorgeous, defined curls, the same question kept coming back: how did they do it?
Here is the reframe that finally made it click for me, and it is the thing most “make your hair curlier” guides leave out. You cannot change the curl pattern you were born with; that is set by the shape of your follicle[1]. So “making your hair curlier” is not about forcing a new pattern. It is about two things: removing whatever is hiding the curl you already have (damage, buildup, weight, and friction), and styling in a way that encourages your strands to clump and hold. I worked through the science of this with my friend, a hair scientist and cosmetic formulator with a PhD in chemistry, so the tips below are the ones that actually do those two jobs.
In this guide we will group every technique by the job it does, so instead of trying all sixteen at once, you can start with what your hair actually needs:
Get a Haircut · Use a Frizz-Smoothing Shampoo and Conditioner · Apply Leave-In Conditioner · Opt for Curl-Enhancing Products · Try a Deep Conditioner · Consider a Protein Treatment · Explore Hair Bond Products · Use a Clarifying Shampoo · Scrunch Out the Crunch · Diffuse · Air-Dry · Apply a Heat Protectant · Plopping · Denman Brush · Finger Coiling · Pin Curling.
How to Make Your Hair Curlier (Quick Answer)
You cannot change your natural curl pattern, but you can reveal more of it. Remove what flattens your curls (damage, product buildup, and heavy or wrong products), then style to encourage clumping and hold using techniques like scrunching, diffusing, plopping, and curl-enhancing gels or creams. Healthier, lighter, well-defined strands curl up more than weighed-down or damaged ones.
Why Your Curls Look Flatter Than They Really Are
If your curls fall flat, it is almost never that you lack some internal balance to correct. It is usually one of these, and each has a different fix:
- Product buildup weighs hair down. Films from conditioners, oils, and stylers accumulate and flatten curls. Buildup is formula-dependent and washes out with regular shampoo[2].
- Damaged, straightened ends. Heat, color, and bleach wear down the strand so the ends lose their bend and elasticity; newly grown roots often look curlier than the worn ends.
- Too much product, or too rich a product. Heaviness flattens fine or loose curls fastest; the fix is less product, or a lighter one, not more.
- Friction and disrupted clumping. Brushing when dry, rough towels, and touching while drying break up the curl clumps that make hair look curly.
- Length and weight. Longer hair is heavier, and weight pulls curls into looser shapes; a trim can let them spring up.
Notice what is not on that list: “too much moisture” or a “moisture-protein imbalance.” You cannot overload a strand with stored water (its water content tracks the humidity around it), and there is no moisture-protein seesaw to balance. The real levers are the ones above, and the sixteen methods below act on them.
Choose Your Method Based on What Your Hair Needs
Not every method works the same for everyone. The fastest route to curlier, more defined hair is to start with the group that matches your hair’s current condition, rather than trying everything at once. The sixteen tips below are organized under these four jobs.
- Hair-health fixes (for damaged, limp, or stretched-out curls): haircut, deep conditioner, protein treatment, bond products.
- Cleansing and prep (for buildup, heaviness, or dull curls): frizz-smoothing shampoo and conditioner, leave-in, clarifying shampoo.
- Styling techniques (to encourage curl formation and shape): scrunching, diffusing, air-drying, heat protectant, plopping, finger coiling, Denman brush.
- Hold and definition (to keep curls from falling flat): curl-enhancing creams, mousses, gels, pin curls.
Group 1: Hair-Health Fixes (for damaged, limp, or stretched-out curls)
1. Get a Curly Haircut
Damaged hair often shows straighter ends than roots, a rough texture, and little shine, and it loses the bounce and elasticity that let curls form. When the ends are worn, they simply do not hold a curl the way healthy hair does. Trimming off those compromised ends, even as little as a quarter inch, can make your existing curl pattern look noticeably springier, because you are removing the dead weight that was pulling it straight.
Experts generally suggest a trim every six to eight weeks. You do not need a big chop; regular dusting keeps the ends healthy so the curl can spring up. A curly haircut that cuts curl by curl can also help your stylist work with your natural pattern rather than against it.

2. Treat Your Hair to a Deep Conditioner
A good deep conditioner makes curls feel softer, look shinier, and spring up more, because well-conditioned strands are smoother and more flexible. Deep conditioners do this with the same workhorse conditioning agents as a rinse-out (cationic agents, fatty alcohols, and slip ingredients), just at higher levels and with longer contact time[4]. Reach for one when your hair feels rough, weak, or hard to define.
If your hair is damaged (more permeable to water, often called high porosity), a richer mask suits it; if it is healthy and simply feels coated or limp, a lighter formula keeps curls from flattening.
Porosity here is the condition of your cuticle, not a fixed type you are stuck with. Use a mask weekly or every couple of wash days, adjusting to how your hair responds. A few I like:
3. . Consider a Protein Treatment
Protein treatments can help genuinely weakened hair hold its shape better, but not because they put lost protein “back” into the strand. Hair is dead keratin; what these treatments do is deposit hydrolyzed protein fragments that temporarily reinforce the surface and improve a damaged strand’s strength and elasticity until the next wash[5][6].
On a weak, overstretched strand that can mean curls that bounce back instead of falling limp. Use one only when your hair actually tests weak, roughly every four to six weeks or as needed, and follow with conditioner for slip. A couple I reach for:
For how to tell whether your hair needs protein at all, and how to use it without making hair stiff, see my protein guide.
4. Explore Hair Bond Products (a Different Category From Protein)
Bond builders such as Olaplex and K18 are often lumped in with protein, but they are a separate category that aims to reconnect bonds inside the cortex rather than coat the surface. They may help damaged, over-processed hair feel stronger and hold curl better, but it is worth being honest that the evidence they truly rebuild the interior is still limited and debated[7].
Treat them as a promising option for color- or heat-damaged hair, not a guaranteed curl fix, and do not expect a surface-strengthening feel like a protein reconstructor gives.
Bond product I have used: Olaplex (bond multiplier / treatment) and the K18.
Group 2: Cleansing and Prep (for buildup, heaviness, or dull curls)
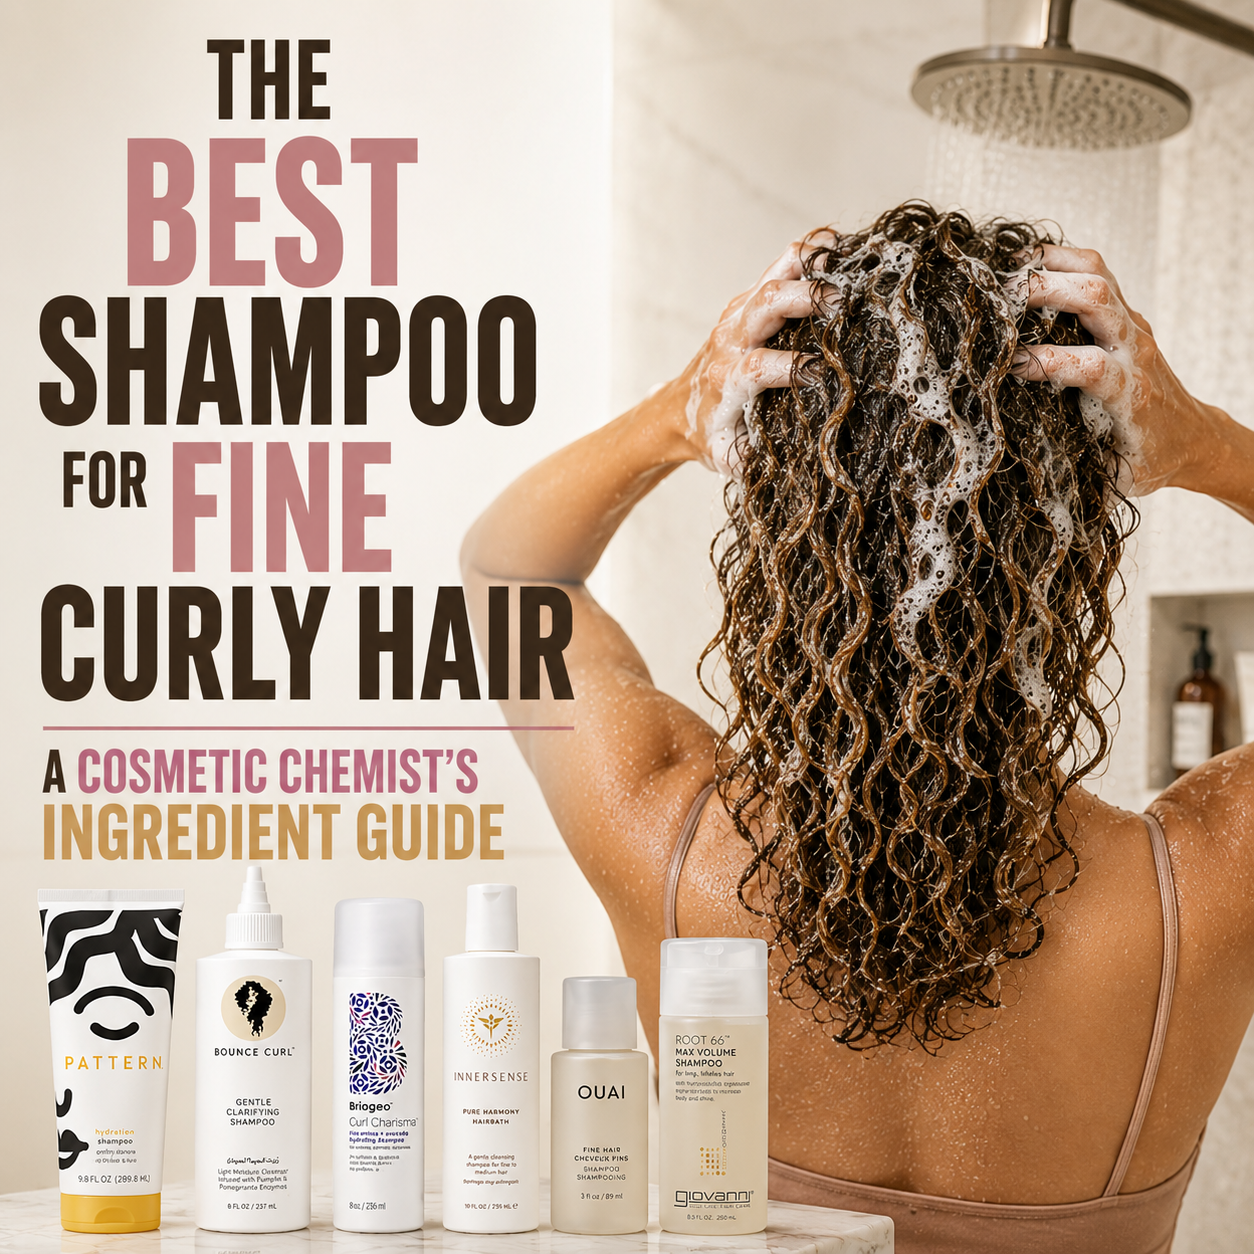
5. Use a Frizz-Smoothing Shampoo and Conditioner
Frizz can blur your curl pattern and keep strands from clumping into defined curls. A smoothing shampoo and conditioner help because their conditioning agents lie along the cuticle and reduce friction, so the surface is smoother and strands align into curls more easily[4].
Smoother, lower-friction strands also hold their shape longer through the day. This is conditioning at work, not added water; the products are coating and smoothing the strand, which is what gives that soft, defined feel.
A pick I like: Ouidad Advanced Climate Control De-Frizzing Shampoo & Conditioner
6. Apply a Leave-In Conditioner
A leave-in keeps strands smooth and detangled after you rinse, which helps curls form and cuts friction-frizz as they dry. It is lightweight enough not to flatten waves when you use the right amount.
For fine hair, use less; too much will weigh curls down. Apply to soaking-wet hair so it distributes evenly and helps your curls clump.
7. Use a Clarifying Shampoo to Reboot
When curls feel heavy, dull, or limp and a regular wash is not cutting it, product buildup is often the culprit, and a clarifying shampoo strips away the accumulated films, oils, and residue so your natural pattern can spring back[8].
You do not need to clarify often; regular shampoo handles most buildup. Reserve clarifying for when heaviness clearly is not budging, or before a bond or protein treatment, rather than as a routine reflex.
Group 3: Styling Techniques (to encourage curl formation and shape)
Style on soaking-wet hair: the clumping step most people skip
Before the individual techniques, the single biggest lever for curl definition is when you style. Curls clump best when the hair is fully saturated, because water temporarily holds strands together in their natural groupings; styling product applied over that wetness locks the clumps in as they dry[9].
If you apply product to towel-dried or half-dry hair, the clumps have already started breaking apart and your curls look thinner and frizzier. So rake and scrunch your leave-in and styler through hair that is dripping wet, not damp. This one habit often does more for “curlier” hair than any single product.
8. Scrunch Out the Crunch
Scrunching out the crunch means gently squeezing your hair upward from ends to roots once it is fully dry, to break the hard gel cast and reveal soft, defined curls underneath. A tiny bit of light oil on your palms helps the cast break cleanly.
Tip: skip coconut oil for this step; it is heavier and can leave fine curls looking greasy and weighed down[10]. My go-to is a light finishing oil worked through the palms to soften the cast (I use Righteous Roots Oils as a gel-cast softener, not for any growth claims. Use my discount code: Vmuse at checkout to save $$).

9. Diffuse
A diffuser dries curls while keeping their shape, which reduces frizz and adds volume. Pair it with a firmer-hold gel for definition. When hair is partly dry, cup sections into the diffuser bowl toward your roots and scrunch gently; bending forward adds root volume. Use low heat to limit damage.
For a visual demonstration of how I diffuse my hair, check out the video below.
10. Air-Dry
Air-drying is the gentlest option and works well, especially for naturally curlier textures, since it avoids heat entirely. The trade-off is time. If you are in a hurry, a blow dryer on its lowest, coolest setting speeds things up with less stress than high heat. Try not to touch hair while it dries, since that is when frizz forms.
11. Apply a Heat Protectant (When You Do Use Heat)
Minimizing heat protects your curl pattern, but when you do diffuse or blow-dry, a heat protectant is essential; it forms a barrier that reduces the cuticle damage heat causes[11].
Apply it to damp hair and give it a few minutes to set before drying. Protecting the strand keeps it strong enough to hold a defined curl over time.
12. Plop Your Hair
Plopping speeds drying and encourages definition by cradling wet curls against your head in a soft cloth or T-shirt, so they set in their clumped shape rather than stretching out under their own weight. Do it right after applying stylers, before diffusing or air-drying.
Here is a YouTube video by Penny Tovar showing how to plop your hair.
13. Define With a Denman Brush
A Denman-style brush with spaced bristles can gather strands into clumps for more uniform, defined curls. Start at the roots and glide gently to the tips without tugging, which can cause breakage. No brush on hand? Your fingers can rake and separate for a similar effect.
14. Finger Coiling
Finger coiling defines curls one section at a time and is great on soaking-wet hair. Take about an inch-wide section, wrap it snugly around your finger from root to tip, hold a few seconds, then release into a spiral. Repeat throughout. It is time-consuming but excellent for stubborn or loose sections.
Check out this super quick tutorial on how to finger coil your hair by Rizos Curls:
15. Pin Curling
Pin curling is a no-heat way to coax flat or misshapen curls into shape:
- Section and prep: take a 1 to 2 inch section, finger-comb from root to tip.
- Create the curl: wrap the hair around your finger from the end to the root, twisting to tighten.
- Secure: slide your finger out, hold the coil at the scalp, and pin it in place.
- Repeat across the head, working top to bottom.
Here’s a great step-by-step tutorial by Lavdysheva:
Group 4: Hold and Definition (to keep curls from falling flat)
16. Opt for Curl-Enhancing Products (Cream, Mousse, or Gel)
Curl-enhancing products define and hold your natural pattern, control frizz, and keep curls from falling flat through the day. How to use them well:
- Remove excess water with a microfiber towel or T-shirt (but keep hair quite wet for clumping).
- Apply to wet hair, a small amount first, raking or scrunching through evenly.
- Dry undisturbed, air or low-heat diffuse, and avoid touching until fully dry.
- Scrunch out any crunch at the end for soft, defined curls.
Curl-Enhancing Creams
Creams add hold, definition, and slip, and suit looser or drier curls that want softness. Apply a small amount through damp or dry hair, then style and scrunch. Favorites:
- Bouncecurl Avocado & Rose Oil Clump and Define Cream
- Bouncecurl Defining Butta – this is specifically made for 4 hair types. I have 3C hair type, but it works well with my texture.
- Cantu Curl Activator
- SheaMoisture Curl Enhancing Smoothie
Curl-Enhancing Mousses
Mousses define with a lighter feel and good hold, which makes them great for fine hair or as a frizz-fighting last step. Apply to wet hair, scrunch, and style. Favorites:
- Design Essentials Curl Enhancing Mousse, Almond and Avocado
- OGX Locking + Coconut Curls Decadent Creamy Mousse
- SheaMoisture Frizz-Free Mousse
Curly Hair Gels
Gels give the strongest hold and the longest-lasting frizz control, forming a cast that locks curls in place; you then scrunch out the crunch for softness. Favorites:
- Here is a list of some great holding gels that I love:
- BioSilk Rock Hard Gel
- Bumble and Bumble Anti-Humidity Gel Oil
- Camille Rose Curl Maker
- Ecoslay Orange Marmalade Curl Definer Gel
- Innersense Organic Beauty “I Create Hold”
- Ouidad Advanced Climate Control Heat and Humidity Climate
Why Your Curls Fall Flat by Midday (and How to Refresh Without Wrecking Them)
Getting curly hair is only half the battle; keeping it defined through the day is the other half, and it is where a lot of people lose their curls. Curls drop for a few predictable reasons: not enough hold so the cast never set, touching and separating too much, humidity loosening the style, or weight from heavy product pulling curls down by afternoon.
The fix is mostly technique, not more product. Let a gel cast fully form and dry before scrunching it out, so the curl is locked before you soften it. Sleep on a satin or silk surface and in a loose pineapple or braids to cut the overnight friction that flattens curls. And when you refresh, do not resaturate the whole head; mist lightly or smooth a little leave-in over the surface and re-scrunch, so you revive the clump without keeping hair wet and swollen all day. Learning to refresh instead of rewet protects both your style and the long-term health of your curls. [KEEP EXISTING LINK: internal: frizz / refresh / overnight routine guide]
The Biggest Mistakes That Keep Your Hair From Curling
- Using heavy products (or too much), which flatten curls under their own weight.
- Touching hair while it dries, which breaks up clumps and creates frizz.
- Skipping hold products, so curls never set and drop within hours.
- Not clarifying real buildup, leaving curls coated, dull, and limp.
- Styling on hair that is too dry, so the clumps break before product can lock them in.
Choosing the Right Products for Your Hair
The right products make the biggest difference, and “right” depends on your hair, not on a hero ingredient on the label. Match the product’s job and weight to your texture: looser or fine curls do best with lighter creams, mousses, and gels that will not flatten them, while denser or coarser curls can carry richer creams and stronger gels. If you are not sure of your texture, my curl type guide can help you start. [KEEP EXISTING LINK: internal: curly hair types guide]
The thread through all of it: lighter, healthier, well-defined strands curl up more than heavy or damaged ones. Choose by role and weight, change one thing at a time, and watch how your hair responds over a few wash days.
The Bottom Line
If your hair will not curl the way you want, it is usually not about trying harder; it is about using the right approach for what your hair actually needs. You cannot change the curl pattern you were born with, but you can reveal far more of it by clearing away what flattens it, keeping strands healthy and light, and styling to encourage clumping and hold. Some of these methods improve definition the same day; others (cuts, deep conditioning, protein on genuinely weak hair) work over time by restoring strength and elasticity. Start with the group that matches your hair’s condition, give it a few wash days, and let your curls tell you what is working.
References
- Lee Y, Kim Y-D, Hyun H-J, Pi L, Jin X, Lee W-S. Hair shaft damage from heat and drying time of hair dryer. Ann Dermatol. 2011;23(4):455–462.
- Robbins CR. Chemical and Physical Behavior of Human Hair. 5th ed. Berlin: Springer; 2012.
- Barba C, Méndez S, Martí M, Parra JL, Coderch L. Water content of hair and nails. Thermochim Acta. 2009;494(1–2):136–140.
- Gavazzoni Dias MFR. Hair cosmetics: an overview. Int J Trichology. 2015;7(1):2–15.
- Robbins CR. Chemical and Physical Behavior of Human Hair, on hydrolyzed protein deposition and surface reinforcement. 5th ed. Springer; 2012.
- Neudahl GA. Proteins for conditioning hair and skin. In: Schueller R, Romanowski P, eds. Conditioning Agents for Hair and Skin. Taylor & Francis; 1999:139–166.
- Martins, et al. Cosmetics. 2024, on bond-building treatments and the limited, contested evidence for cortical repair.
- Draelos ZD. Essentials of hair care often neglected: hair cleansing. Int J Trichology. 2010;2(1):24–29.
- Robbins CR. Chemical and Physical Behavior of Human Hair, on water and curl clumping during styling. 5th ed. Springer; 2012.
- Rele AS, Mohile RB. Effect of mineral oil, sunflower oil, and coconut oil on prevention of hair damage. J Cosmet Sci. 2003;54(2):175–192.